How to Use Shopify with WordPress (No Plugin Required)
Want to add Shopify to your existing WordPress blog/website?
Then you have come to the right page as in this tutorial, I go through step by step, how you can use Shopify with WordPress.
EcommerceGold is reader supported and we may earn a commission from products or services purchased through links on our site at no additional cost to you, to learn more please see our affiliate disclosure.
How Does it Work?
Unlike most ecommerce options in WordPress, you don’t need to install a plugin, instead, you copy and paste HTML code from Shopify and into a WordPress page.
This HTML code brings over important information such as your product title, description, images and price as well as a buy button that allows your customers to purchase from you. It is also possible to set up the check-out process so that your customers never leave your site.
When it comes to managing your orders, all of this needs to be done from the Shopify dashboard. While some may find this extra step frustrating, it does add an additional layer of security as none of your customer’s data is stored or accessible from your WordPress dashboard, which is great for data protection, especially if your WordPress site gets hacked.
Step 1: Sign Up to Shopify
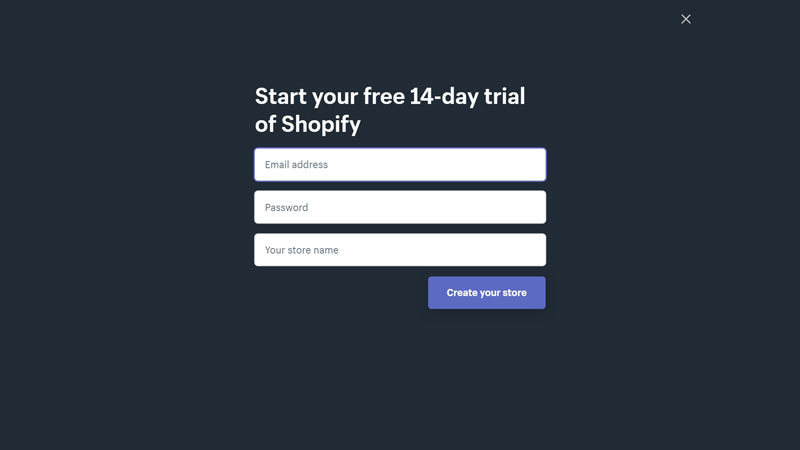
The first step is to sign up to Shopify but you only need to use the Shopify Lite package, which costs $9 a month but you can try this method out using their 14-day free trial, then if you like it, you can upgrade to a paid package.
The sign-up process for Shopify is very simple, all you need to do is fill out the initial sign-up form, then answer a few questions on where your business is currently at in terms of turnover and then enter your basic business information such as an address, contact telephone number etc.
Once you have done this, you will then be taken through to the Shopify dashboard.
Before you can begin processing sales with Shopify, you will first need to upgrade from a trial to a paid plan (you can run test orders on the trial but need to be on a paid plan to accept orders from paying customers). To do this go to Settings → Plan → Change Plan.
Then scroll down the page until you see the option to Remove your online store, which sounds scary but all this does is remove the Shopify website builder from your plan.

Simply follow the instructions once you click the Remove online store button and you will be able to sign up to the Shopify Lite plan.
Step 2: Adding the Buy Button Sales Channel to Shopify
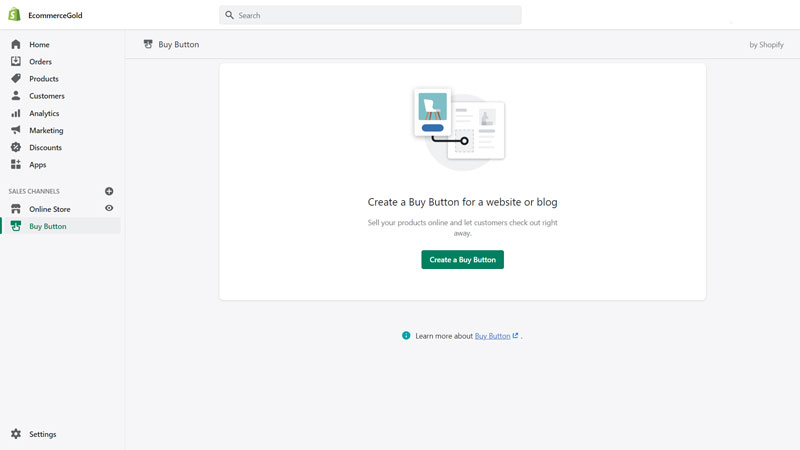
Step 2 is adding the Buy Button sales channel. To do this, click the ✚ icon next to Sales Channels and a pop-up window will appear with all of the available options.

In the pop-up window, you then want to click the ✚ button next to the Buy Button section and Shopify will install this sales channel to your website.
*On the Shopify Lite package, most of these sales channel options won’t be available as most are only available to users with the full website builder package such as Shopify Basic or Standard.
Once the Buy Button has been installed and you click on the Buy Button heading under sales channels, the following screen will appear.
Step 3: Create Product Listings
Before you can create a Buy Button on Shopify, you first need to create a product listing within Shopify.
This is very easily done by going to Products → Add Product in the Shopify dashboard.
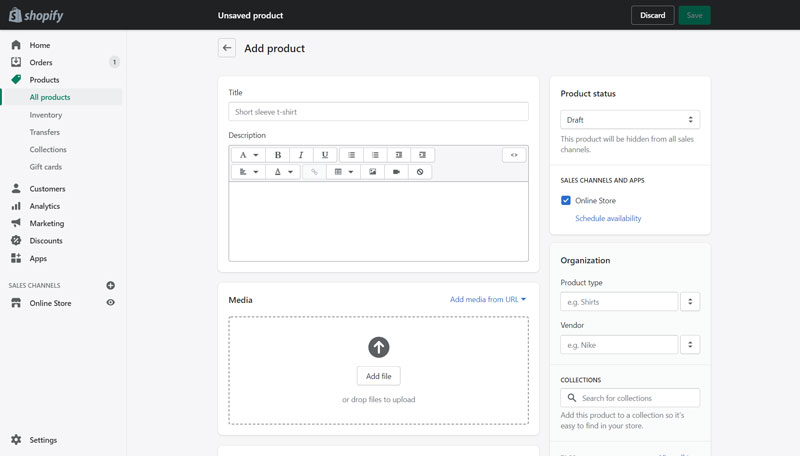
You want to work through this page and fill out all of the sections except for the search engine preview at the very bottom of the page as this is going to be taken care of on your WordPress site. If you want to learn more about creating a product, I have covered this in our full Shopify Tutorial.
Step 4: Creating a Buy Button
Once you have created all of your product listings, you can then begin the process of creating your buy button and to do this, you want to click on the Buy Button option under the Sales Channels heading in the Shopify menu.
On this screen, you want to click on Create a Buy Button and you will be asked if you want to create a button for a product or collection and in this instance, you want to click product.

A pop-up will then appear asking you which of your products you would like to create a buy button for and simply select your chosen product, this will then take you through to the page where you can customize your button.
Button Settings
Layout Style
The first setting you want to set up is what style of Buy Button do you want to create and there are three options:
- Basic
- Classic
- Full View


Once you have selected the style of button that you want to create, you can then configure the options and settings for the button.
Button Action
The first option is to choose the action for when people click the button:
- Add product to cart, which adds the product to the cart and people can carry on shopping.
- Direct to checkout, takes the buyer directly to the checkout
- Open product details, this is only available on the Basic and Classic buttons and it opens a pop-up that shows the products description
Button Styling
The next option is for styling the button and options here include:
- Button Corners – how rounded you want the corners of the button to be
- Button Width – how wide you want the button to be
- Colors – choose the background and font color for your button
- Typography – choose the font style and select the size
Layout Options
The next option set of options is for the layout and the number of options available depends on the style of button that you choose:
- Image Size (Classic only) – choose the size of the image that is displayed. There is also a checkbox that allows you to show additional product images as well
- Alignment (Basic and Classic) – choose how the title, price and button align under the product image
- Button Text – choose what the text is shown on the buy button
- Quantity – a checkbox that allows buyers to choose the quantity of the product that they want to buy
- Colors (Classic and Full View) – select the color of the font for the title, price and description (full view only)
- Typography (Classic and Full View) – choose the font style and size for the title, price and description (full view only)
Cart Options
There are also options for the shopping cart, including:
- Change Wording – choose the wordings within the cart including the Heading, Subtotal, Additional Info, Button Text and Empty Cart
- Order Note Field – choose whether to add an order note field so buyers can add additional info to their order
- Colors – choose the background and font color for the cart
Pop Up Settings
If you choose to have the detailed pop-up appear as the action from the button, then you have some options for this pop-up:
- Button Text – choose the wordings of the add-to-cart button
- Show Quantity Field – let buyers choose to buy multiple quantities of your product
- Colors – choose the background and font color for the pop-up
- Typography – choose the font style and size for the title, price and description
Advanced Settings
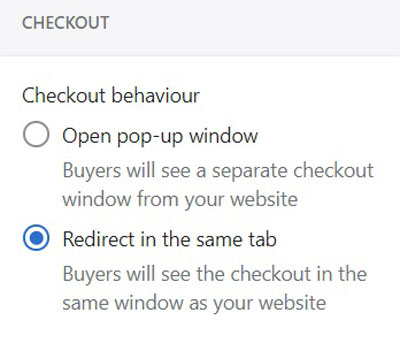
The final options under the advanced settings heading are all to do with how to checkout operates and there are two options to choose from:
- Open a Pop-Up Window – this opens a small pop-up window with all of the checkout options contained. On mobile devices, this will open a new tab.
- Redirect in the Same Tab – this redirects the browser to the Shopify checkout and offers a seamless experience/transition from your WordPress site to the Shopify checkout.
There is just a small problem that I encountered with the Redirect in the Same Tab option and that is that there is no way as standard to get the buyer back to your site once they have completed the checkout but fortunately for you, I have figured out a way to add a link to the order confirmation/thank you page that buyers can click on the go back to your site.
The code below adds a content box to the Shopify checkout page and all you need to do is insert your desired URL, which could be your home or shop page (where I have put Insert Page URL Here) and then edit the text so that it says what you want it to and then customers will be able to manually go back to your WordPress site.
<script>
Shopify.Checkout.OrderStatus.addContentBox(
'<p><a href="Insert Page URL Here">Click Here</a> to go back to Insert Website Name Here</p>',
)
</script>
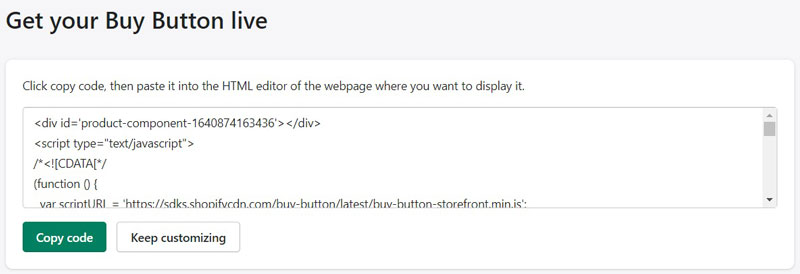
When you are happy with the layout of your buy button, you can click the next button in the top right hand side of the page and you will be taken through to the HTML code that you need to copy and paste into your WordPress site.
Add Buy Button to WordPress Page
Now that you have the HTML code for the buy button, you can go into your WordPress dashboard and create a post or page in which to paste the code.
For this tutorial, I am using the Gutenberg Page Builder and to paste the code, you need to use the Custom HTML Block, which can be found by clicking the ✚ icon and searching for the Custom HTML Block. Once the block has been added to the page, simply paste the code that you copied from the Shopify dashboard.
Once you have pasted the code, you can use the preview button to see what the code is going to look like on your site, if you are happy with how the page looks, then you can publish the page and the product will now be available for sale.
How to Add Collections
As you will have seen above, you can also create a Buy Button for Collections and the process is very similar to that of a single product but I have still outlined the process below:
Create a Collection
The first step is to create a collection within Shopify and there are two ways you can set these up:
- Manual Collections
- Automated Collections
To help you set up your collections, I have created a tutorial video showing how to do this or you can check out our full written guide to Shopify collections.
Create Collections Button
The process for creating a collections button is the same as that for a single product. The only difference is that you select the Collection option, rather than the product option when starting to create a new button.
The options available for customizing your Buy Button is very similar to that which I outlined for a single product, so you can:
- Choose the action that happens when the button is clicked (Add to Cart, Direct to Checkout or Open Pop-up Box)
- Button Style options
- Layout Options
- Shopping Cart Customisation
- Pop-up Customisation
- Advanced Settings for the Checkout

One thing you cannot do when setting up a Collection Buy Button is specify how many products are shown per row, this is decided by Shopify and depends on the number of products in your collection.
Once you are happy with the setting for the collections, simply click next in the top right corner, then copy and paste the code into one of your WordPress pages.
Cart and Checkout Display
So that is how to import your products from Shopify into WordPress but how does the shopping cart work?
To make the checkout process as seamless as possible, Shopify also brings in a cart that appears as a pop-up sidebar on your website, just like the image below:

This sidebar can be minimized if customers want to continue shopping on your site or they can proceed through the checkout.
Once the customer decides to pay for their purchase, it all depends on the checkout method you selected above as to whether the checkout pages appear in a pop-up window or it redirects the existing tab to the Shopify servers.
Configure Shopify
If you are happy with the way that Shopify is working on your WordPress website and want to go live with it, you need to set a couple of things up first. The main ones are the:
- Payment Gateway/s
- Shipping Methods
- Checkout Process
Once these are set up, then your new products are pretty much ready to go live but I would advise running a couple of test orders through first, to make sure that the checkout is working properly and also that you know how it all works on the back end.
If you want to learn more about setting up different sections within Shopify, then take a look at my full Shopify Tutorial.
Conclusion
The Shopify Buy Button is a great option for WordPress website owners to add ecommerce functionality to their website and it is also pretty easy to do and I hope this guide has shown you how to do this properly.
The only negative I have found is that Shopify doesn’t save the buy buttons but due to the very clever people at Shopify, if you do update your products or collections within Shopify, it will automatically be updated on your WordPress site.
So once again, I hope you found this guide on how to use Shopify with WordPress helpful and that you go on to combine these two great platforms to make an awesome ecommerce website.

Hi, I'm Paul, the Owner and Founder of EcommerceGold.
I ran my own Ecommerce Business for over 7 years and now help others start their own online retail empires!