One of the best integrations that Ecwid offers is with WordPress, which is the world’s largest website builder but how do you use these two platforms together to create an ecommerce website?
Well, that is what I am going to cover in this short tutorial but I am not going to cover things like creating products or managing orders etc as I have already covered that in my full Ecwid tutorial and all of these work exactly the same when you use Ecwid with WordPress.
Instead, I am going to cover how to integrate and use the Ecwid platform with WordPress.
Disclosure: Our site is reader supported, meaning we may earn a commission from purchases made through our links, to learn more, please see our Affiliate Disclosure.
Sign Up to Ecwid
So before you can start using Ecwid with WordPress, you need to sign up and create an account with Ecwid and you only need a free account to get started, which only requires your name, email address and to create a password. Obviously, you will also need a self-hosted WordPress website as well!
If you want to upgrade to a paid account before you integrate with WordPress, just go to My Profile → Billing and Plans in the Ecwid dashboard, then select and pay for the plan that you wish to use.
How to Add Ecwid to WordPress
Once you are all set up with Ecwid, you can then add it to your WordPress website and this is done in the form of a plugin, so just go to the Plugin Library and search for Ecwid and then install and activate the plugin.

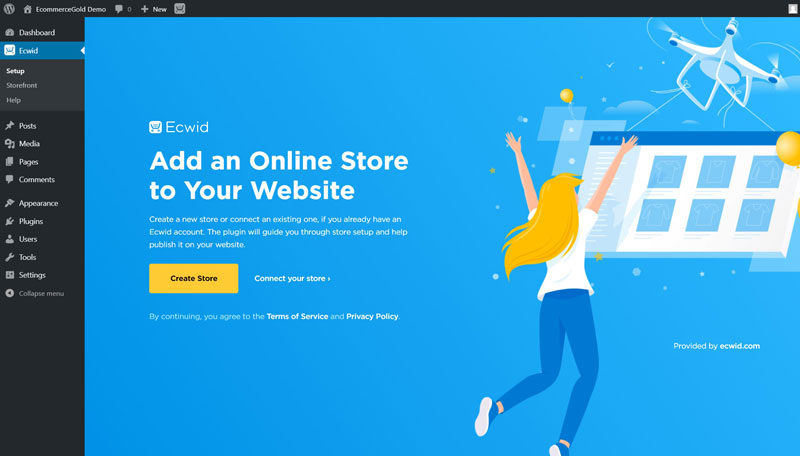
Once it is installed and activated, click on the Ecwid heading that will appear in the main WordPress dashboard (it should be just under Dashboard) and you will see a screen appear similar to the one above.
As you have already created you store, click Connect Your Store and it will bring up a prompt to connect your Ecwid account with your WordPress website, it is best to be logged in to your Ecwid Dashboard at this point.

Double check the information to make sure it is all correct and when you are happy with it click accept and this will prompt the two platforms to integrate.

Once this is completed, you will see that nearly all of the options and headings from the Ecwid dashboard are now available under the Ecwid section of your WordPress dashboard.
Setting Up Your Ecwid Store
Once you have synced Ecwid with your WordPress website, it is time to start setting up your Ecwid store. Unlike many other ecommerce plugins, Ecwid will only create one page on your site and this is the main Store page.
Due to the way Ecwid works when integrated with WordPress, all associated pages such as:
- Category
- Product
- Checkout
- Account
Can all be accessed through the store page (on the front end of your site), this means that any display settings that you change such as setting the page to full width, which removes the sidebar, applies to all of the pages mentioned above.

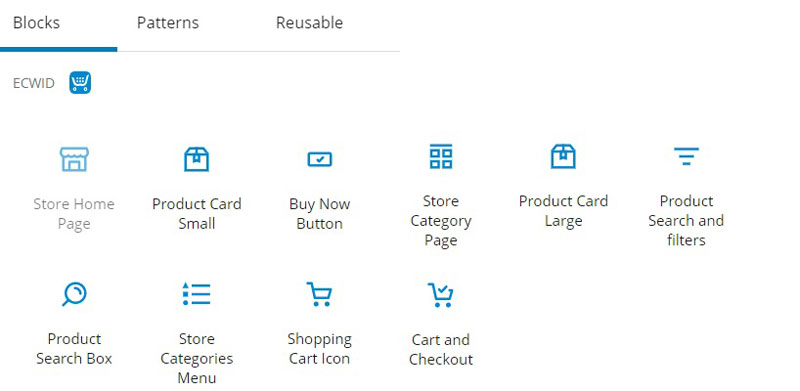
To make changes to your store page, go to Pages → Store and you will see a page similar to the one above if you are using the Gutenberg page builder. If you click on the Store Home Page block, you will see a selection of headings appear in the right hand sidebar and they include:
- Category List Appearance – if you have created product categories, you can select how they appear on the Store page.
- Product List Appearance – similar to the categories above but the options are for your featured products.
- Product Page Appearance – this is where you set how your product page appears on your website, including choosing the layout option and what displays on the page.
- Store Front Page – this includes all the options for what appears on your store page and they are:
- Category List & Featured Products
- Expanded Categories
- Only Featured Products
- Category Page
- All Products with Filters
- Store Navigation – choose which Ecwid navigation menus appear on your site (these are separate to your main navigation menu.
- Color Settings – select the colours for your store, including Button, Text and Price.
When you are setting up your store page, I would recommend choosing what you have display on your store front page before changing anything else.
You can also choose to have a cart icon appear on your site, this can be done by going to Appearance → Customize → Ecwid, here you can choose where/if it appears on your site and also how it looks.
Create Custom Ecwid Pages
As I mentioned above, all of the Ecwid pages work from the main store page but you can choose to create custom pages for Ecwid elements within WordPress and Ecwid does include some prompts to help you set up additional pages and these can be found by going to Ecwid → Configuration → Storefront and if you scroll down the page a little, you will see the Additional Pages Options.

As you can see in the image above, there are a few options for pages listed here including:
- Cart and Checkout
- Search and Filters
- Category Page
If you click the create button, these pages will automatically be created for you but you can do this manually by creating a new page and adding one or multiple of the Ecwid blocks that are available for the Gutenberg page builder.
If you just want to add links to your navigation menu, you don’t need to create specific pages to do this, I cover how to do this a little further down the page.

These blocks can also be used in blog posts, which is a great way to increase the amount of sales through your website.
Creating a Store Sidebar
If your theme supports sidebars and you want to have a sidebar on your store pages, the Ecwid plugin does include a selection of widgets.

To edit your sidebar, go to Appearance → Widgets and you will see the widgets listed above as part of your selection and you can tell the Ecwid specific ones by the pale blue icon next to the title of the widget.
Just be aware that these widgets will appear on any page where that sidebar is active, not just the pages related to Ecwid.
Adding Ecwid Store to Navigation Menu

When adding a store to your WordPress website, you want to add links to it throughout your site and the easiest way to do this is, is via navigation menus.
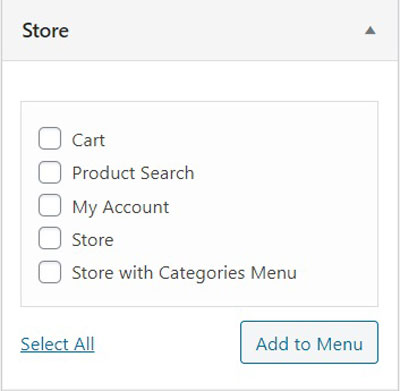
To add Ecwid links to your navigation menu, go to Appearance → Menus and under the Add Menu Items section, there will be an option for Store and expanding this option will give you a selection of five options:
- Cart
- Product Search
- My Account
- Store
- Store with Categories Menu
The Store with Categories Menu will add a link to your store page if they click on store but it will also add a drop down menu with links to all of your product categories (if you have created product categories).
If you want to add any of these links to your footer, you will need to create a second menu and then add your chosen links. Once this has been been set up, you need to go to Appearance → Widgets and add the Navigation Widget to one of your footer sections and then select the menu that you just created, this will then add these links to the footer of your site.
Conclusion
Ecwid make the process of adding a fully hosted checkout to a WordPress very simple and hopefully this guide has shown how easy it is to do.
As I mentioned at the start of the guide, if you want to learn more about how to use Ecwid, then check out my Full Ecwid Tutorial, which covers everything from creating a product to adding payment gateways.
Hi, I'm Paul, the Owner and Founder of EcommerceGold.
I ran my own Ecommerce Business for over 7 years and now help others start their own online retail empires!


