How to Create a Page of Collections on Shopify
Collections are a great way to organise your products on Shopify but how do you create a page that just shows a selection of curated collections?
In this Shopify tutorial, we will show you how you can create a page of collections and there are two different methods, one is for sites using the new Shopify OS 2.0 themes and the other is for the older Shopify themes.
Create a Page of Collections Using Shopify OS 2.0 Themes
The first method is using the new Shopify OS 2.0 themes and if you haven’t already switched or thought about switching, it is definitely worth considering as theme customisation and the ability to build custom pages is much easier.
Show All Collections
If you want to create a page that lists all of your collections, Shopify does include a standard template that allows you to do this.
To add this page to your Shopify store, in your admin dashboard go to Online Store → Navigation → Main Menu and then click add item to menu and the following sidebar pop up will appear:


When you click on the link box, a drop-down menu will appear showing all of the options that you can add to the navigation menu and you want to click Collections and a second menu will appear showing all of your collections along with the option you want to click, which is All Collections.
This will add a link to your menu and if you want to confirm these changes, click Save Menu at the bottom of the page and this option will be added to your main menu.
With the new customizer that is a part of Shopify OS 2.0, you can now go in and customize the Collections list page and this can be done by going to Online Store → Theme → Customize and you will then be taken to the customizer.
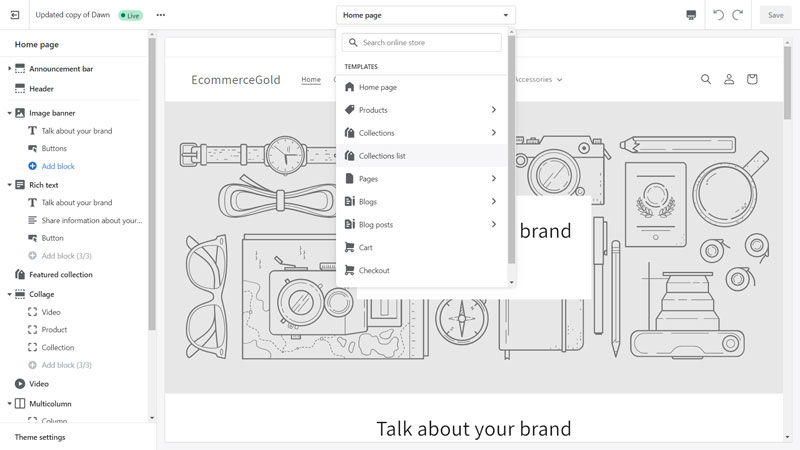
To access the Collections List page, click on the drop-down menu at the top of the customizer and click Collections List and it will take you through to the collections list page.

In the left sidebar, you will see two main options for the page:
- Collections list page section
- Add section
If you click on the Collection list page section, you will be shown some of the customization options for the page including:
- Heading
- Sort collections by
- Image ratio
You can also add sections to the page, which offers much more in terms of customization, which is one of the big differences with Shopify OS 2.0.

Once you have set the page up how you want it, just click save in the top right-hand corner of the customizer and all the changes will be published to your site.
Awesome, job done right? Not quite as this page lists ALL of the collections on your site and you can choose which ones are displayed. Fortunately, there is a great way to create a Custom Page of Collections, which will be shown below.
Creating a Custom Collections Page
Step 1: Create a New Page Template
To create multiple custom collections pages, we are going to need to create a new page template in Shopify and this is much easier to do with Shopify OS 2.0.
To create the new page template, you need to go into the page customizer, which can be accessed by going to Online Store → Themes → Customize. When you are in the customizer, click on the drop-down menu at the top of the page to bring up all of the page options for your store.


From the drop-down menu click on Pages and then + Create template and a pop-up will appear like in the image below:
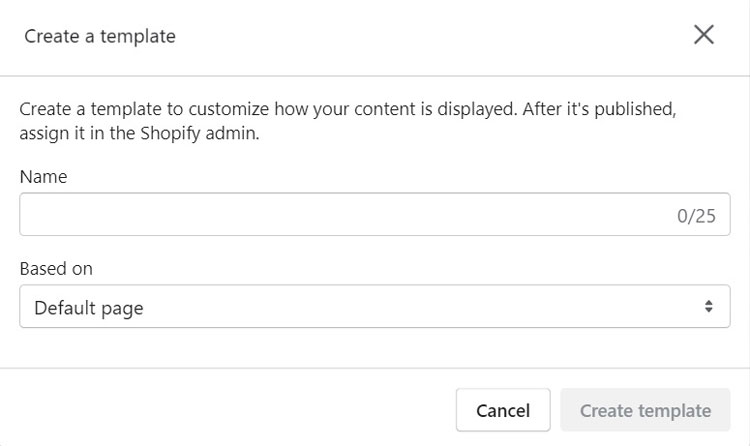
In the pop-up, enter a name for the template and choose which page to base the template and as we are creating a brand new template, use the default template as the base for this one.

Step 2: Customize The Template
Once the new page template has been created, it is time to set it up for listing our chosen collections.
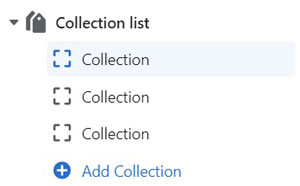
The first step is to add a new section to the page and for this, we want to add the Collection List section, which adds the following elements to the page:
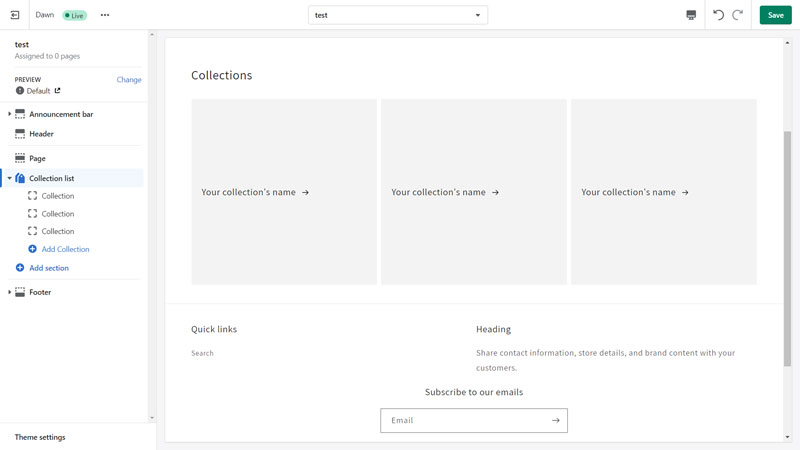
To add your selected collections, click on one of the collection slots in the sidebar, click add collection and then select your chosen collection from the list of collections.


Once you have selected the collections that you want to be displayed on the page, click save and this template will have then been created.
Step 3: Create a New Page
Now that the template has been created, it needs to be applied to a page and to do this, go to Online Store → Pages → Add New.
When setting up the new page, you want to select the template that you just created and this is done by clicking on the drop-down menu on the right-hand side under theme template. Once you have selected the template, make sure the page is set to visible and then save the page to make it active on your site.

Then choose the collections that you want to appear on the page, as you can see in the image above, these are all different types of watches.
Once you are happy with the collections that you want to display on this page, click Save to create the new menu.
Step 4: Add Page to Main Menu
The final step is to add a link to the new page in your main navigation menu and it is basically the same as the steps shown in the Show All Collections sections at the start of this post but I’ll still give a quick summary!
Go to Online Store → Navigation → Main Menu → Add item to menu but instead of going to the Collections section from the menu that appears when you click the link box, you want to look under Pages and find the page that you created.

Once you have found the page, click add and then save the menu and your new collections page will have been added to your main navigation menu. If you then view the front end of your site, when you click on the link to your new collections page, like the image below:

Important: Add Images to your Collections
If you haven’t added an image to your collection, then it will display the default Shopify placeholder. So make sure you have added images so that it displays properly.
Create Multiple Pages of Collections
So what if you want to create multiple pages of collections so that it is easier for customers to navigate around your site?
This can also be done within Shopify OS 2.0 but in a different way than creating a page of collections due to Shopify not allowing for the creation of sub-collections.
To do this, you need to create a new page template following the steps above but you want to use the Multicolumn section instead of the Collections List.
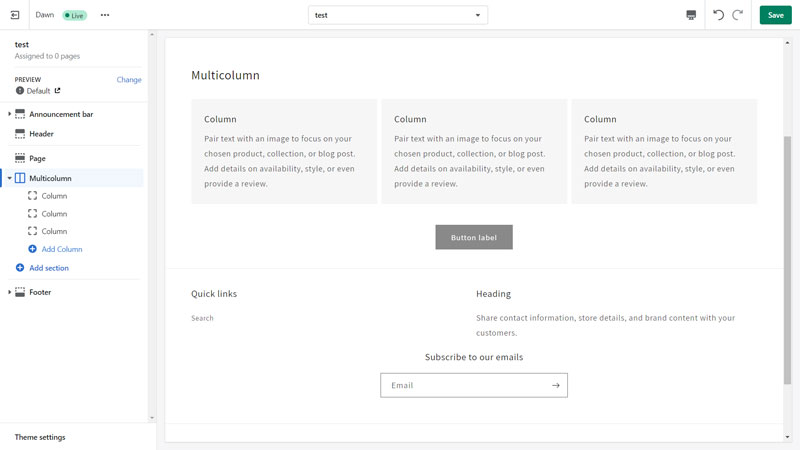
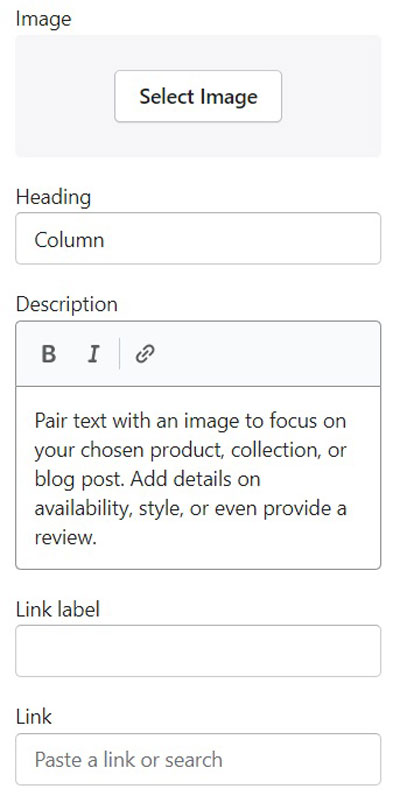
This isn’t quite as simple as the Collections List section, which is just a couple of clicks as you need to manually set these up by using the settings that are available when you click on the individual Columns in the sidebar:
- Select an Image from your image library
- Enter a Heading (Optional)
- Add a Description (Optional)
- Link Label
- Link (Select a Collection from List)
Also, if you want to remove the button from underneath the Multicolumn, click on the Multicolumn heading to bring up to options for the section and remove the text in the button label setting.
Create a Page of Collections using Original Shopify Themes
If you are using one of the older Shopify themes, you can still create a page of collections but the process is a bit more technical and doesn’t offer as many customization options as the method mentioned about but it is still better than nothing.
Show All Collections
If you want to create a page that lists all of your collections, Shopify does include a standard template that allows you to do this.
To add this page to your Shopify store, in your admin dashboard go to Online Store → Navigation → Main Menu and then click add item to menu and the following pop-up will appear:

The first option is to add a name for this link, which is completely up to you but when you click in the link box, a menu will appear you want to click Collections and then All Collections.
This will add a link to your menu and if you want to confirm these changes, click Save Menu at the bottom of the page and this option will be added to your main menu.
You can then go into the Shopify theme customizer (Online Store → Themes → Customize) and you will see the new option added to your main menu and there are some options within the customizer for this page. To access these, choose Collections list from the drop-down menu at the top of the customizer.

In the right sidebar, you will see options for:
- Header
- Collections list page
- Footer
Click on the Collections list page section and it will display all the options that are available and you can choose to show all collections or just ones that you select, you can also choose how you want them to be sorted and also how many collections are shown per row.
Awesome, job done right? Not quite as Shopify only allows you to have one of these pages on your site. To have multiple custom collections pages takes a little bit more work, but I will show you exactly how to do this below.
Creating a Custom Collections Page
Step 1: Create a New Page Template
To create multiple custom collections pages, we are going to need to create a new page template in Shopify and this requires a little bit of code, this may sound scary but it really is quite simple.
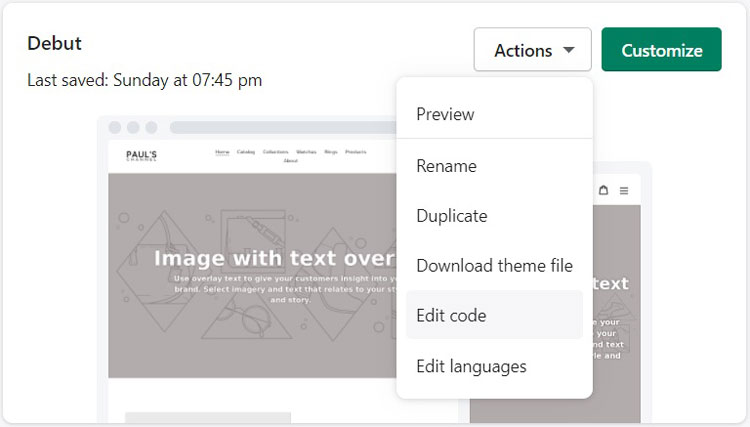
To add the new template, you need to go to Online Store → Themes and select Edit Code from the Actions tab next to Customize as can be seen in the image below:
Important: Back Up Your Theme
Now doing this usually doesn’t cause any problems with your site BUT it is always better to be safe than sorry, so from the Actions drop-down menu, click duplicate to create a duplicate copy of your theme that you can restore should anything go wrong.
In the edit code section, go to the templates section and click the Add a new template option and the following pop-up will appear:
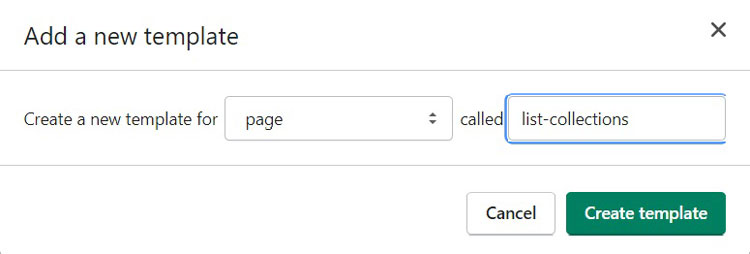
To add the new template, select the page from the drop-down menu, name it list-collections and then click Create template to create the new template. By default, Shopify adds some basic code to this site, which needs to be removed in order to add the correct code.
So select all of the default code and copy and paste the following code:
{% comment %}
  Collections are listed here.
{% endcomment %}

{% capture uses_minimal_framework %}{% include 'product-loop' %}{% endcapture %}

{% if uses_minimal_framework contains 'Liquid error' %}
  {% assign uses_minimal_framework = false %}
  {% assign grid_item_width = 'large--one-quarter large-up--one-quarter medium--one-third medium-up--one-third small--one-half large--col-3 medium--col-4 small--col-6' %}
{% else %}
  {% assign uses_minimal_framework = true %}
  {% assign grid_item_width = 'span3' %}
{% endif %}

{% assign image_size = 'large' %}

{% if linklists[page.handle].links.size > 0 %}

  {% assign number_of_links = 0 %}

  <div class="grid-uniform{% if uses_minimal_framework %} row{% endif %} clearfix">

    {% for link in linklists[page.handle].links %}

      {% if link.type == 'collection_link' %}

        {% comment %}
        If we have a collection link.
        {% endcomment %}

        {% assign collection = link.object %}
        {% assign number_of_links = number_of_links | plus: 1 %}

        <div class="grid__item grid-item product-grid-item {{ grid_item_width }} text-center">
          <div class="grid__image product-grid-image">
            <a href="{{ link.url }}" class="grid-image--centered">
            {% comment %}
              Bring in the featured image of the first product in the collection if no collection
              image has been uploaded for it.
            {% endcomment %}
            {% if collection.image %}
              <img src="{{ collection | img_url: image_size }}" alt="{{ link.title | escape }}">
            {% else %}
              {% assign product = collection.products.first %}
              <img src="{{ product | img_url: image_size }}" alt="{{ link.title | escape }}">
            {% endif %}
            </a>
          </div>
          <p class="collection-grid__item-title">
            <a href="{{ link.url }}" class="collection-item__title">{{ link.title }}</a>
          </p>
        </div>

        {% if uses_minimal_framework %}
          {% cycle 'clear-item': '', '', '', '<div style="clear:both"></div>' %}
        {% endif %}

      {% elsif link.type == 'page_link' %}

        {% comment %}
        If we have a page link.
        {% endcomment %}

        {% assign number_of_links = number_of_links | plus: 1 %}

        {% assign linked_page = link.object %}
        {% assign have_image = false %}

        {% comment %}
          Does the page contain an image? If so, let's use it.
        {% endcomment %}

        {% if linked_page.content contains '<img' %}

          {% assign have_image = true %}
          {% assign src = linked_page.content | split: 'src="' %}
          {% assign src = src[1] | split: '"' | first %}
          {% capture image_suffix %}_{{ image_size }}.{% endcapture %}
          {% assign src = src | replace: '_small.', image_suffix | replace: '_compact.', image_suffix | replace: '_medium.', image_suffix | replace: '_large.', image_suffix | replace: '_grande.', image_suffix %}

        {% comment %}
          If the page contains no image, and that page features collections, let's grab the image of the first
          collection on it.
        {% endcomment %}

        {% elsif linklists[linked_page.handle].links.size > 0 and linklists[linked_page.handle].links.first.type == 'collection_link' %}

          {% assign have_image = true %}
          {% assign collection = linklists[linked_page.handle].links.first.object %}

          {% if collection.image %}
            {% assign src = collection | img_url: image_size %}
          {% else %}
            {% assign src = collection.products.first | img_url: image_size %}
          {% endif %}

        {% endif %}

        <div class="grid__item grid-item product-grid-item {{ grid_item_width }} text-center">
          <div class="grid-image product-grid-image">
            <a href="{{ link.url }}" class="grid-image--centered">
              {% if have_image %}
                <img src="{{ src }}" alt="{{ link.title | escape }}" />
              {% else %}
                <img src="{{ link.title | handle | append: '_' | append: image_size | append: '.png' | file_url }}" alt="{{ link.title | escape }}" />
              {% endif %}
            </a>
          </div>
          <p class="collection-grid__item-title">
            <a href="{{ link.url }}" class="collection-item__title">{{ link.title }}</a>
          </p>
        </div>

        {% if uses_minimal_framework %}
          {% cycle 'clear-item': '', '', '', '<div style="clear:both"></div>' %}
        {% endif %}

      {% endif %}

    {% endfor %}

  </div>

  {% if number_of_links == 0 %}

  <div class="grid">
    <div class="grid__item grid-item rte text-center">
      <p>
        There are no links of type <i>Collection</i> in your <b>{{ page.title }}</b> link list.
        Go ahead and <a href="/admin/link_lists/{{ linklists[page.handle].id }}" target="_blank">edit your link list</a> to use links that point to collections.
      </p>
    </div>
  </div>

  {% endif %}

{% else %}

<div class="grid">
  <div class="grid__item grid-item rte text-center">
    <p>
      You do not have a link list with a handle set to <kbd>{{ page.handle }}</kbd>, or you do and it's empty.
      Go ahead and create a link list called <b>{{ page.title }}</b> on your <a href="/admin/links" target="_blank">Navigation page</a> and populate that link list with links that point to collections, to see collections listed here.
      Make sure the link list also has a handle set to <kbd>{{ page.handle }}</kbd>.
    </p>
  </div>
</div>

{% endif %}

<style>
  kbd {
    background-color: #FBFBE4;
    padding: 1px 4px;
    border-radius: 3px;
  }
</style>
Just to be clear, I didn’t create this code (I’m not that clever!) and you can view the original source on Github.
Once you have pasted the code into the newly created template, click save and you are ready to move on to the next stage, which is actually creating a page of collections.
Step 2: Create a New Page
Now that we have created our new page template, it is time to put it to use and to do this we are going to create a new page, to do this go to Online Store → Pages → Add page.

There are only two things you need to do when you are creating a new page for collections and that is set the name of the page and select the newly created page.list-collections option from the Template suffix drop-down menu on the right-hand side of the page.
Once this is done, click save to create the new page.
Step 3: Create a New Menu
The next step does seem a little strange but it is an important part of the process, this is because the collections that we are going to include in this menu are what are going to appear on the page we just created.
To create a new menu go to Online Store → Navigation → Add menu. When naming the new menu, you want it to match the page that you just created, so in this example, we are going to be calling them Watches.
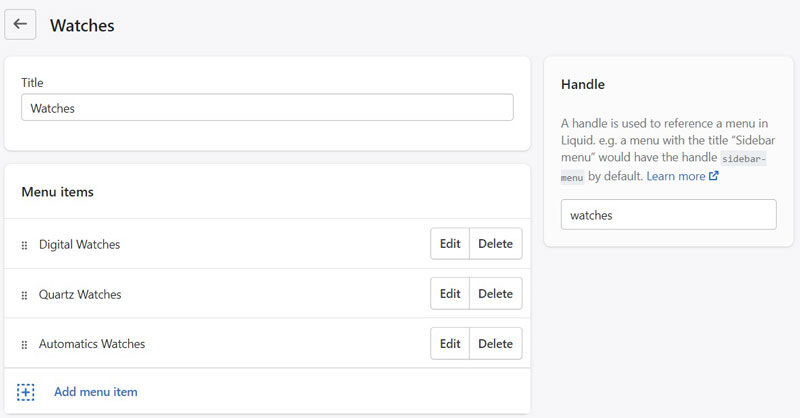
Then choose the collections that you want to appear on the page, as you can see in the image above, these are all different types of watches.
Once you are happy with the collections that you want to display on this page, click Save to create the new menu.
Step 4: Add Page to Main Menu
The final step is to add a link to the new page in your main navigation menu and it is basically the same as the steps shown in the Show All Collections sections at the start of this post but I’ll still give a quick summary!
Go to Online Store → Navigation → Main Menu → Add item to menu but instead of going to the Collections section from the menu that appears when you click the link box, you want to look under Pages and find the page that you created.
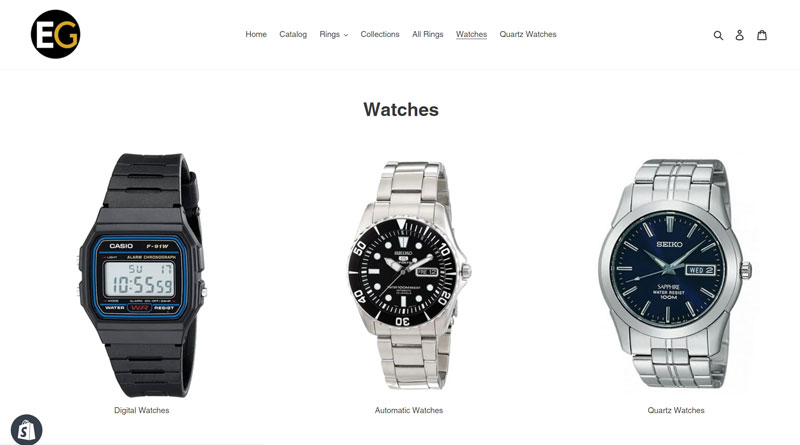
Once you have found the page, click add and then save the menu and your new collections page will have been added to your main navigation menu. If you then view the front end of your site, when you click on the link to your new collections page, like the image below:

Important: Add Images to your Collections
If you haven’t added an image to your collection, then it will display the default Shopify placeholder. So make sure you have added images so that it displays properly.
Add Title to Page (Optional)
The code above doesn’t add a title to the page but by adding the simple bit of code below, this can be done easily.
<div class="section-header text-center">
        <h1>{{ page.title }}</h1>
      </div>
Where you want to enter this code on line 20, which is before the grid-uniform div section of the code. You may want to add an empty line above and below the above code.

This will then add the title of the page to the front end of the site.
Create Multiple Pages of Collections
With the old Shopify themes, you can use this code to create an additional layer for your collection pages.
It is very simple to do as the process is nearly identical, the only step that is slightly different is that when you create a new menu, link to the pages that you created (in this example watches), rather than collections (hope that makes sense!).
You can only add one additional layer though as for some reason, if you try and duplicate this on another layer, the collection images don’t show.
Conclusion
So, there it is, how to create a custom collections page within Shopify, whichever type of theme you are using.
Both methods are very easy to do but the OS 2.0 method does give you far more control and as mentioned in the tutorial, if you haven’t already switched over to one, then it is definitely worth considering due to how much more control you get over customizing your Shopify store.

Hi, I'm Paul, the Owner and Founder of EcommerceGold.
I ran my own Ecommerce Business for over 7 years and now help others start their own online retail empires!