When it comes to setting up a Shopify store a lot of the work is focused on the backend of your store (the admin dashboard) but you also want to spend some time working on the front-end as this is what your customers see.
And when it comes to design, you not only want your store to look good but also to be functional and easy to use as ultimately, your goal is the get your customer to the order confirmation page as easily as possible.
When it comes to customizing your Shopify store, there are a few different elements and we are going to cover all of these in this tutorial, so let’s get started…
Choosing a Shopify Theme
The first step in customizing your Shopify store is to choose a theme and there are a few different options you can choose from:
- Shopify Theme Store – this is Shopify’s official theme store and there is a selection of free and paid options to choose from. Some themes are made by Shopify but most of the paid themes are made by selected Shopify partners
- Theme Marketplaces – there are a few different marketplaces out there such as ThemeForest and all themes are made by third-party developers, usually cheaper than buying from the Shopify Theme Store but support is dependent on the developer
- Direct from Developers – you can also purchase themes directly from developers through their own sites
But which one is best? We personally recommend buying themes from the official store as they are from approved Shopify partners and you can try them before you buy (just make sure you don’t publish them to your live site or you will be charged!) but they can be more expensive.
You also need to find a theme that fits your brand but just bare in mind that it will probably require some customization to make it look similar to how it does on the demo stores.

Installing a New Theme
Once you have chosen the theme that you want to use for your store, you need to install it and it does depend on where you purchased the theme as to how this is done but we will show you both methods below:
1. Themes From Shopify
If you decide to use a theme from the Shopify theme store, the installation process is very simple, simply head to the Shopify theme store and make sure that you are logged in to Shopify, then click on the theme that you want to install and there will be two options:

To add the theme to your store click on the try theme button and you will be shown a load screen of the theme being added to your store.

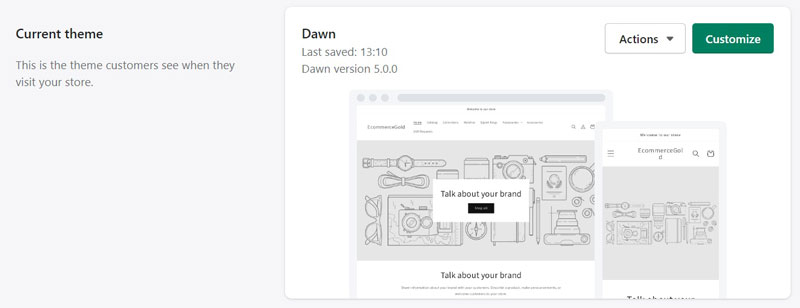
Once the theme has been added to your store, you will be taken to the themes section of the dashboard, which is found under the Online Store heading and in the Theme Library section of the page, you will see the theme that you have just installed.

It may take a few seconds for the theme to be installed after you are redirected to this page but once it has been installed, you will be able to preview and also customize the theme but if it is a paid theme and you are just trying it out, make sure not to click the publish option from the Actions drop-down menu unless you are sure that you want to use this theme for your store.
2. Uploading a Shopify Theme
If you have bought a theme from a marketplace or developer, then you will need to upload the .zip folder to your store
This is done by going to Online Store → Themes and scrolling down to the theme library section, clicking the Add theme button and then selecting Upload zip file from the drop-down menu.

This will then open a pop-up and you simply need to click Add file, which opens the browse option for your device, select the .zip file you want to upload and then click upload file.

It may take a couple of minutes for the file to upload and be available in your theme library but once it has been installed, you can then choose to preview, customize or publish this theme to your store.

How to Change Logo
Once you have selected your theme, it is time to start customizing it and one of the first things you want to do is upload your business’s logo as it is an important part of your site’s branding and this is very simple to do.
You just need to open the Shopify Customizer, which can be found by going to Online Store → Themes and clicking on the Customize Button for either your active theme or one that you have in your theme library.

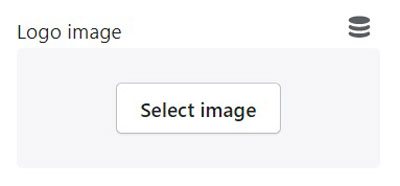
When the theme customizer opens, click on the header heading in the sidebar and you should see an option for Logo image with a button saying select image, click on this button and you will be able to upload a new image or choose an image file that has already been uploaded to Shopify.


Once your chosen image has been selected, it should now be visible on the storefront preview. There are also options to set the width of the logo and also the position of the logo (the options here may be theme-dependent.
If you want to make the image visible on your live storefront, make sure you click save and this will publish the logo to your store if you are customizing your active theme.
How to Change Favicon
The next thing to customize is your store’s favicon but you might be thinking what is a favicon?
The favicon is the little icon that is shown in the browser tab, followed by the page title and while it is only a small thing, it can help to make your site look more professional and is definitely worth changing.

To change your store’s favicon, you still need to be in the theme customizer but this time you want to go to the theme settings, which should be accessible at the bottom of the customizer sidebar.
This will then bring up all of the theme settings for your chosen theme and there should be a heading called Favicon, simply click on this and it should present you with an option to select an image.

This process is basically the same as choosing your logo as you can choose to upload a new image or select one that you have already uploaded, once you have chosen your desired favicon and click save to publish them.
You can then check on the frontend of your store to see that the favicon has updated, it may take a few seconds and one or two-page refreshes but it should then display your custom favicon.

Customizing Your Theme
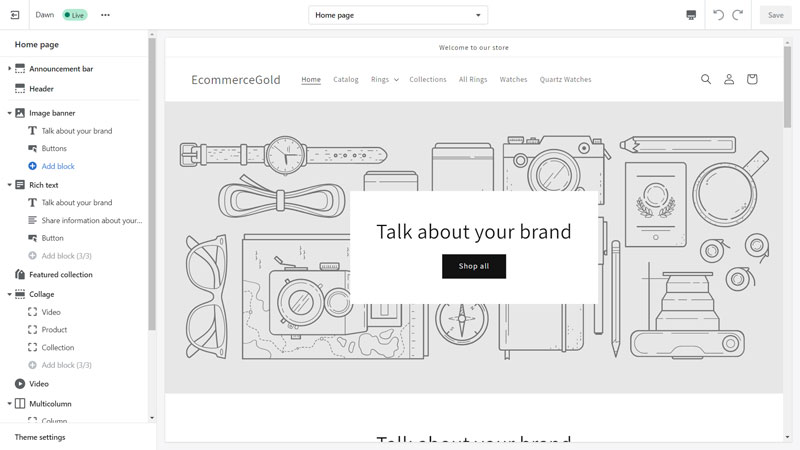
Now we’ve got two of the main customizations out the way, let’s look at more general theme customization and with the new OS 2.0 setup, it offers you a lot of choices but let’s explain how it works.
Announcement Bar
The announcement bar is the first option in the Shopify customizer sidebar and it is optional if you use this for your store or not.
If you do want to use it and edit the default text, click on the arrow next to the Announcement bar heading and then click on the Welcome to our store block.

This will bring up the edit options, which allows you to change the text, alter the color scheme and add a link to one of your store’s pages.
At the bottom of the sidebar will also be an option to remove this block.
You can also add multiple announcement bars but it is best to not overdo it!
If you want to hide your announcement bar rather than remove it, hover your cursor over the Announcement bar heading and click on the eye icon, which will then hide it on your store.

Header
If you have already changed your logo, then you will have already seen some of the options available for your store’s header but we are going to cover them here anyway.
- Color Scheme – this is the color scheme for your header, which applies to the background and font color (these options can be changed in the theme settings
- Logo Image – this is where you set your sites logo
- Custom Logo Width – a slider that allows you to set the width of your logo
- Desktop Logo Position – a drop-down menu with options for the position of your logo
- Menu – choose which menu you want for your main menu
- Desktop Menu Type – choose from a dropdown or mega menu, with checkboxes for line spacers and sticky header
- Spacing – set a margin between your header and the pages content
The options that you set in the header will apply to your whole site, meaning that the header will look the same of your homepage and your product pages but some of the options here may be theme specific.
Page Content
Next up are all of the tools to build out your pages content and Shopify’s customizer is based on sections, which are individual sections that can be added, removed and rearranged on nearly every page on your site and there are a total of 16 standard sections to choose from, which are:
- Blog Posts – shows your site visitors a summary of your site’s blog
- Collage – allows you to display 3 media items in the form of a collage, you can choose an Image, Product, Collection or Video and these can be rearranged so they display in the way you want
- Collapsible Content – this displays rows of collapsable content, great for FAQs
- Collection List – display a list of collections on your sites page, can choose which collections and in which order they are displayed
- Contact Form – a simple contact form consisting of name, email, phone number and message box
- Custom Liquid – enter custom liquid code
- Email Signup – a simple email signup form
- Featured Collection – display a list of products from one of your collections
- Featured Product – display a single product
- Image Banner – display an image banner with an optional text box and buttons
- Image with Text – add an image with inline text and button, which can be rearranged
- Multicolumn – customizable columns can be used for images, text and links to pages you choose
- Page – display a page within a page
- Rich Text – a text box with a heading, body text and button options
- Slideshow – similar to the image banner but with the option to add multiple images that change at intervals which you choose
- Video – embed a video into your pages, must be hosted elsewhere

Each section also has its own individual settings, which can be accessed by clicking on the section heading in the sidebar (section needs to be added to the page in order to be accessed), some sections also have the option to add blocks within the section.
But how do you add, remove and reorganize these sections?
Adding a new section is very simple.
At the bottom of the sidebar, just above the Footer option is a plus icon with Add section next to it, click this and a list of available sections will appear.
To view all sections, you will need to click the view more option at the bottom

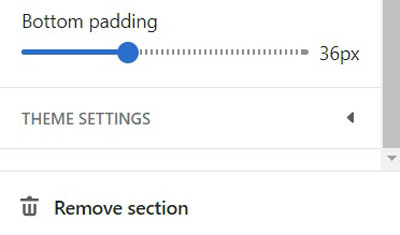
To Remove a Section, just click on the section heading to display all the settings and at the bottom will be an option to remove the section.
The same applies to blocks within a section.
You can also choose to hide a section by clicking on the eye symbol that appears when hovering over a section in the sidebar.

To Rearrange the Sections, hover your cursor over the heading of the section and click on the six dots, then simply drag it to where you want to sit in the sidebar.
The same also applies to blocks within a section.

Footer
The final option in the main sidebar is for your store’s footer, which is a great place to add things like your store policies and newsletter signup box.
There are two options for customizing the Shopify footer section, the first is to add blocks and there are 3 types you can choose from:
- Menu – choose one of your site’s menus
- Text – a text block with a header
- Image – add an image

You can add multiple blocks to your footer and each block will act as a column, so don’t add too many or they will end up getting squashed. To customize each block, just click on the block heading and then change the settings for that block.
The second set of options are available if you click on the Footer heading and the options are:
- Color Background – choose the background and font color for the footer
- Email Signup – a checkbox for whether you want to email signup box to show or not (will be displayed below the footer blocks)
- Social Media Icons – choose whether to display your social media links or not (these are set up in the theme settings)
- Country/Region Selector – choose whether a dropdown menu appears with different countries and currencies (these need to be set up in the payment settings)
- Language Selector – if you want to display your store in multiple languages (these need to be added in the language settings)
- Show Payment Icons – choose if you want to display symbols for payment methods that you accept
- Spacing and Padding – set a top margin for the footer and/or top and bottom padding
Some of these options will only apply to stores selling internationally but you still want to work through the footer options, so that you are only displaying the information that you want in your store’s footer.
Theme Settings
At the very bottom of the sidebar in the Shopify customizer is the option to view/edit the theme’s settings and there are a lot of options and too many to go through in detail for this post, so we are just going to give a brief summary:
- Colors – set your store’s primary and secondary colors
- Typography – choose the fonts for your headings and body text
- Layout*
- Buttons*
- Variant Pills*
- Inputs*
- Cards*
- Content Containers*
- Media*
- Dropdowns and Pop-ups*
- Drawers*
- Badges – choose the position and color of your sites badges
- Icons – set the color of your icons
- Social Media – add the links to your social media accounts
- Search Behaviour – toggle product suggestions for your sites search bar
- Favicon – set or change your site’s favicon
- Currency Format – show whether you show currency codes or not
- Checkout – add background images and logos, set positions and sizes, typography and colors for your checkout pages
*All contain styling options for the border and shadow for these elements
Some of these settings are more important than others but it is still worth working through the theme settings to make sure that you have the styling elements you want in place.
Conclusion
Shopify is very powerful when it comes to theme customization and offers a lot of tools and options to help you build a truly custom store for your ecommerce business, even with just using a free theme!
But you need to know how to use all of these tools effectively, which we have tried to cover as much as possible in this tutorial and our advice would be to work through one thing at a time, similar to the way this post has been laid out as this makes the process of learning how to do it much easier.
And as with any tool, the more you use it, the more you learn how to use it and also get the most out of it!
Hi, I'm Paul, the Owner and Founder of EcommerceGold.
I ran my own Ecommerce Business for over 7 years and now help others start their own online retail empires!

