How to Add Tracking Number in WooCommerce
When you are processing orders on your WooCommerce store, one of the things that you want to able to do is add a tracking number for the order so that your customers are notified that their order has been shipped and they can also track it for themselves.
Unfortunately, WooCommerce doesn’t offer this feature as standard but there are plenty of plugins out there that can add it for you and in this short WooCommerce tutorial, we are not only going to share our favorite plugin for doing this but also how to get it all setup and working.
Step 1: Install Advanced Shipment Tracking Plugin
The first step is to install the Advanced Shipment Tracking for WooCommerce plugin. You can either click the links in the post or just search for tracking in the WordPress plugin library.
This plugin is completely free to use, you just need to have WooCommerce installed before installing and activating this plugin.
Step 2: Select Shipping Carriers
Once you have installed and activated the plugin, you want to navigate to WooCommerce → Shipment Tracking → Shipping Providers → Browse Providers.
This should present a list of shipping carriers that the plugin supports, if the list doesn’t appear, then click the gear icon in the top right-hand corner and click the Sync Provider List option. This should add all the options to list and there should be over 250 options.
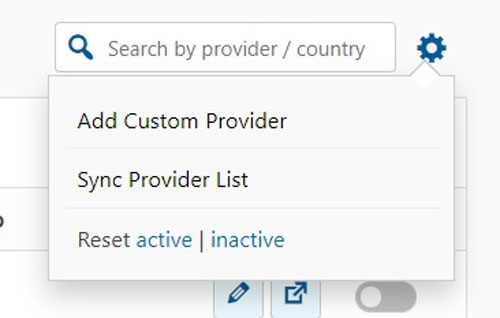
You then want to search for the providers that you use for shipping using the search bar next to the gear icon in the image above. To make the carrier active on your site, click the toggle switch, which will turn it from grey (like in the image above) to blue.
You can confirm that it is active by clicking on the Active Providers tab, where all active options will appear.
If your Shipping Provider doesn’t appear in the list, you can add a custom one by navigating to the Custom Provider tab and click the Add Custom Provider button and the following pop-up will appear:
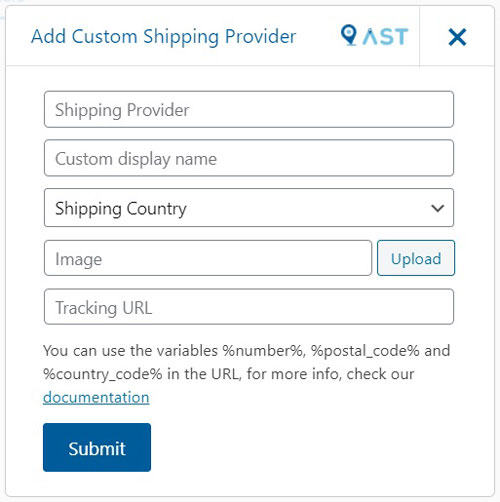
Simply fill in the boxes and it will add your chosen shipping partner to the list of available options.
Plugin Settings
Before putting the plugin into use, it is worth going through the options under the Settings tab, which allows you to:
- Which customer emails include tracking information
- Which order status you can add tracking information to
- How customers can track their order in the my account section
- Customize the email template that contains tracking information
- Choose custom colored order statuses to improve workflow
- Choose the date format
Step 3: Add Tracking Numbers to Orders
Once the plugin has been configured, you can then add tracking information to your orders.
To manually do this, you need to go into your order (by clicking on the order number in the order overview menu) and you will see a Shipment Tracking box appear in the top right corner of the screen.
Clicking the Add Tracking Info button will open up the following box:
Complete this box by adding:
- Tracking Number
- Selecting a Shipping Provider
- The Date it was Shipped
If you have the Mark as Completed box checked, it will automatically update the order status in your dashboard and send an email to the customer letting them know that their order has been shipped and what their tracking number is.
Add Tracking via CSV
If you are dealing with a large number of orders, you may receive your tracking information via a CSV file and rather than adding the tracking information to each individual order, you can upload a CSV file and it will update it for you.
To do this, go to WooCommerce → Shipment Tracking → CSV Import and you will see the following options:
To import the CSV file, click on the Choose File button and select the file from your device, select the date options and where you want to replace to existing tracking information (if this is not checked, then it will add the new tracking information alongside the existing information).
Clicking continue, will upload the file and bulk update your orders.
Conclusion
The Advanced Tracking plugin makes is very quick to set up and makes it nice and easy to add a tracking number to your customer orders, which can make a big improvement to your order management process in WooCommerce.
How to print WooCommerce orders

Hi, I'm Paul, the Owner and Founder of EcommerceGold.
I ran my own Ecommerce Business for over 7 years and now help others start their own online retail empires!