One of the best ways to increase sales and get recurring customers is to sell gift cards and Shopify have very generously included this feature as standard with their subscriptions but how do you set these up?
Well, that is what we are going to cover in this short Shopify tutorial, so let’s get started…
Creating A Shopify Gift Card
The first step is to create a gift card and this can be done by going to Products → Gift Cards and the following screen will be displayed:

And on this screen, there are two options:
- Add Gift Card Product – this is for gift cards that can be purchased through your Shopify store
- Issue Gift Card – this is to create a gift card that is issued directly to a customer
Below is the process for creating both of these types of gift card.
Product Gift Card

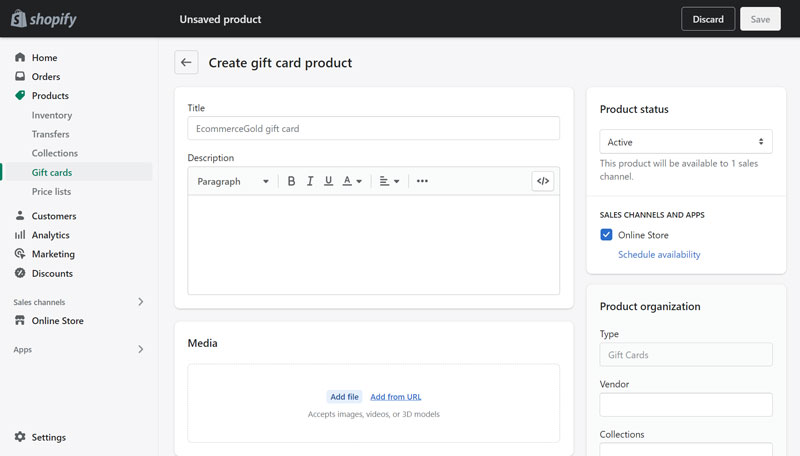
This page is very similar to the add new product page in Shopify as these types of gift cards are a product and include sections for:
- Title and Description
- Media
- SEO Settings
- Product Status
- Organization
- Template (best to stick with the default options)
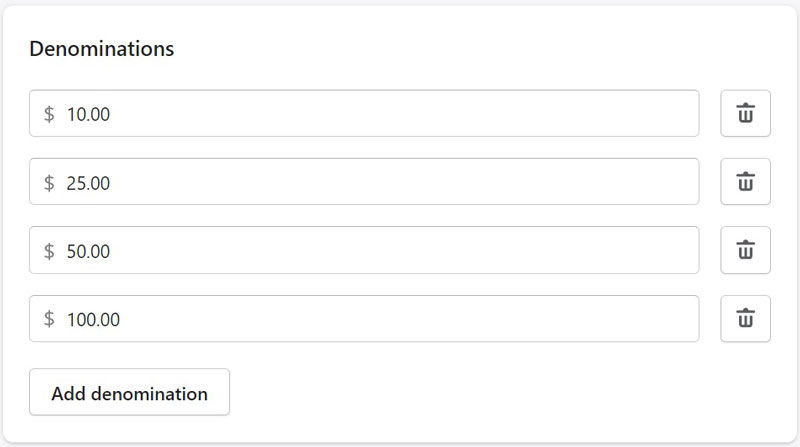
But the most important part of the Add Product Gift Card page is the Denominations section as this is where you set the value for your gift cards.

By default, Shopify will create denominations of 10, 25, 50 and 100 in whichever currency you are using for your store and you can choose to edit these, remove them and/or add additional denominations.
Adding a Gift Card to your Storefront
You want to make these gift cards available on your storefront and there are a couple of ways in which you can do this.
#1 Collections
The first method is to add the gift card to a collection and you can choose to create a new collection just for Gift Cards or add it to an existing collection, either way you want to use the Organization section of the Add New Gift Card page.
You don’t have to worry about the product type as Gift Cards are selected by default.
For the vendor, you can choose to enter your own or if you leave it blank, the name of your store will automatically be applied as the vendor.
For the collections, you can choose to add it to any manual collections that you have created, you can’t manually add it to any automated collections.
The final option is tags and this is one of the best ways to add it to an automated collection as you can either choose an existing tag that you have already created or create a new one and then add this as a condition for your collection.

How the gift card is added to your collections does depend on the type of collections that you are using for your online store but the easiest option may be to create a collection just for your gift cards as this will make them easier to find for your customers.
#2 Navigation Menu
The second option is to add the Gift Card directly to your Shopify store’s navigation menu as this makes it incredibly easy for your customers to find.
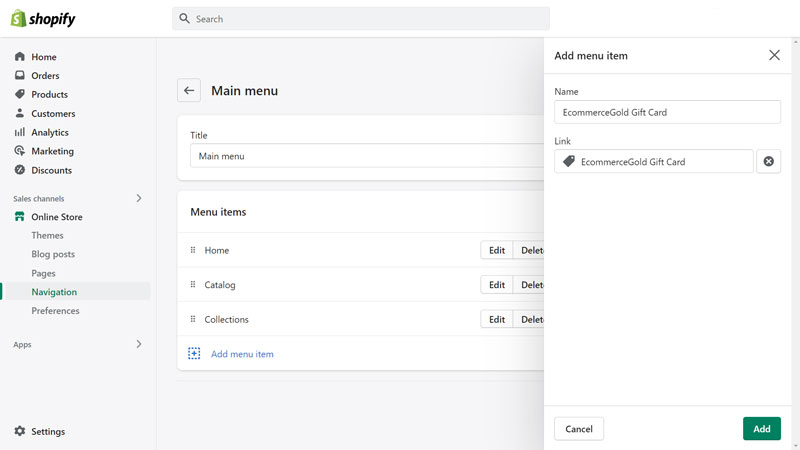
This can be done by adding the Gift Card Product Page, which is ideal if you only have one gift card available or adding a collection specifically for gift cards, which is ideal if you have multiple gift cards.
Either way, you want to go to Online Store → Navigation and then choose which navigation menu you want to add the gift card to and click on that menu to edit it.
Then add a new menu item and either add the gift card product page, which can be found under products or the gift card collection, which can be found under collections and once it has been added to the menu, click save to publish it to your storefront.

Editing Product Gift Card
Just like a normal product on Shopify, you can edit your store’s gift cards and the denominations that you set for your gift card act in a similar way to Variants and can be edited as such.
The first section is the options, which are the denominations that you created when setting up the gift card.

From the options box, you can choose to edit the existing options or add another option. If you click on edit, it will expand to show all the option values that you created when setting up the gift card.
But editing these only changes the name of the option, not the value, which needs to be done in the variations box further down the page.

If you want to remove one of the option values, click on the trash can icon next to the option you want to delete.
You can also add a completely new option to create multiple variations for the gift card but in most cases just having the Denomination option is going to be the most practical and easier to manage.
To change the price of the gift card, you want to scroll down to the variants box and this will show you all of the variants that are currently available, as in the image below:

And to change the price, edit the boxes under the Price heading but make sure that the name of the variant and the price are the same to avoid any confusion with your customers!
You can also choose to add a SKU code for your different Gift Card variants, which could be useful for inventory/sales management and if you click on the edit button, you can also select whether to track the inventory of your gift cards.
Deleting Product Gift Cards
There may be a reason why you want to remove one of your product gift cards from your storefront and there are two options:
- Set it as a draft – so you can use again at a later date
- Delete it – so that it is completely removed from your store
Either way, the process is basically the same, go to Products → Gift Cards → View Product Gift Cards and select the one you want to remove from the list of gift cards.
Then click on the More Actions dropdown menu at the top and select which action you want to complete. If you choose to delete it, you will be asked to confirm this as it cannot be undone.

Issue A Gift Card
A rather cool feature with Shopify gift cards is that you can issue one directly to a customer and there can be many reasons why you would do this such as:
- Store credit instead of a cash refund
- A goodwill gesture
And it is very simple to issue one as there are only a few section on the page.
- Gift Card Code – Shopify generates these automatically but you can choose to enter a custom code if you want to
- Initial Value – how much the gift card is for
- Expiration Date – choose if and when the gift card expires
- Customer – choose from an existing customer or add a customer using their email address or phone number
- Notes – these are for internal use only and could be used for things like the order number in which this gift card relates to
Once you have filled in all of the information and selected a customer, the Activate button in the bottom right will change to Activate and Send and clicking this will make the gift card active on your store and also send the information to the customer.

Editing Issued/Purchased Gift Cards
Unlike product gift cards, there are only limited options once a gift card has been issued to or purchased by a customer.
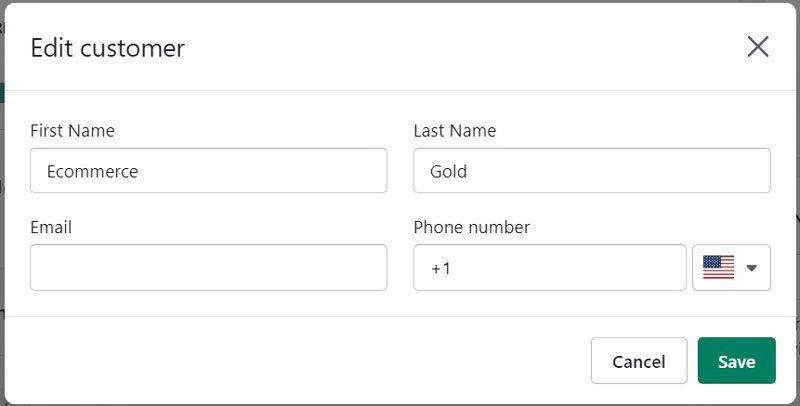
One of the main ones is editing the customer information around that gift card and this can be done by clicking on the gift card and clicking edit under the customer box, which brings up a pop-up that allows you to change the name, email address and phone number.
But this is for the main customer account, not just the name and email associated with the gift card, so be careful before making any changes.

You can also choose to disable a gift card that has been issued or bought but you cannot delete the gift card from the Shopify system once it has been issued and disabled gift cards will still show on your list of gift cards unless you filter them out.
You also cannot see the full code for the Gift Card once it has been issued, you can only see the last 4 digits as it is seen as currency by the Shopify system and even store owners can’t get access to it but if a customer loses their gift card, you can resend the information to them.
Conclusion
Shopify has made it very easy to add and manage gift cards to your store and once they are live and in use, the gift card dashboard will also allow you to see the value remaining on any gift cards that have been bought or issued, which can be useful to see how actively your gift cards are being redeemed.
Hi, I'm Paul, the Owner and Founder of EcommerceGold.
I ran my own Ecommerce Business for over 7 years and now help others start their own online retail empires!

